The widespread adoption of hardwood flooring in modern homes marks a significant trend in contemporary residential design. Both interior designers and homebuyers gravitate towards the inviting warmth and natural charm that hardwood floors contribute to a home’s interior, offering a perfect blend of harmony and natural beauty.
In residential construction, engineered hardwood installation has revolutionized the process, presenting a more straightforward and cost-effective alternative to traditional hardwood floors. Despite their appeal, engineered hardwood floors have their own considerations and hurdles.
Engineered wood floors can rejuvenate any living space with authentic textures, warm tones, and adaptable aesthetics. They are an excellent flooring choice for households of all kinds, whether bustling with pets and children or a single occupant’s sanctuary. After navigating through the various hardwood options and selecting the best fit for your home, the journey towards installing your dream floors begins. However, a few critical preparations lie ahead before starting the transformation.
Engineered Hardwood
Solid hardwood flooring, celebrated for its natural beauty, is crafted entirely from single wood planks, typically sourced from maple, oak, or walnut. It’s notable for its durability, offering a lengthy lifespan that supports multiple rounds of sanding and refinishing, thus preserving its charm and extending its use.
Conversely, engineered wood flooring presents a visually similar alternative to solid hardwood. This option comprises a robust plywood core topped with a real hardwood veneer. While engineered wood provides a cost-effective solution with an appearance closely mirroring solid hardwood, its structure limits the refinishing ability. Nonetheless, engineered wood floors are designed for longevity, potentially enduring upwards of 30 years when properly maintained.
The engineered hardwood installation process is more accommodating to DIY enthusiasts, featuring options for glue-down or click-together planks, facilitating a smoother setup. Choosing engineered or solid wood flooring ultimately hinges on individual preference, given their comparable aesthetic and functional benefits.
Early Installation Considerations
Embarking on engineered hardwood installation is a significant undertaking that requires careful consideration and planning. It is essential to approach this project with the diligence and attention it warrants.
Time and Money
The expense of engineered hardwood flooring encompasses material and installation costs, with materials priced between $3 to $13 per square foot based on quality. Installation charges can range from $3 to $10 per square foot, influenced by the design’s intricacy.
For homeowners pondering the possibility of self-installation to save costs, weighing the benefits is crucial. The decision involves more than just immediate savings. It’s important to consider whether the effort and time you invest in a DIY installation are worth the reduced upfront costs. Engineered hardwood flooring can also add value to the home, which can offset some costs later with proper installation.
The Best Area
Hardwood flooring adds warmth and elegance to the home, including the living room, dining area, bedroom, and study. Those who admire the natural beauty of wood might also consider extending this flooring option into the kitchen or bathroom. However, in these areas, the wood must be meticulously sealed along its edges and coated with a water-resistant yet breathable finish to safeguard against moisture.
Installing hardwood floors at or above ground level is advisable, ensuring they’re no more than three inches below the ground surface. This prevents moisture-related issues in environments prone to dampness.
Prepping For Engineered Hardwood Installation
Starting with a pristine base is essential for any flooring project. Begin by removing any existing flooring to reveal the subfloor, which will serve as the base for the new installation. While vinyl floors or concrete can often be left as suitable foundations for engineered wood, ensuring the area is thoroughly cleaned of dirt, dust, and other residues is crucial for a successful installation. Foreign particles trapped under the new flooring can lead to uneven surfaces, potential damage over time, and an accumulation of dust and odors that compromise indoor air quality.
Addressing issues with the subfloor, such as holes, loose boards, or creaking, is vital before laying new floors. Repairing these problems provides a stable and level foundation, enhancing the overall engineered hardwood installation experience and the performance of the new floors. Ignoring creaky subfloors can result in ongoing noise issues even after the new flooring goes in.
Moisture control is also critical, as excessive moisture can cause engineered wood to warp or swell. Using a moisture meter allows you to assess environmental conditions and make necessary adjustments to ensure optimal levels for wood flooring, which typically thrives in environments between 60 to 80°F.
Ensuring the subfloor is level is another crucial step, especially in older homes where the foundation may have shifted over time. Uneven subfloors can lead to issues with new flooring, from aesthetic concerns to functional problems. Leveling compounds or sanding can create a flat surface for installation.
Underneath
Preparing for obstacles like pipes, door frames, and doors is necessary for a seamless installation. Custom-fitting engineered wood planks around these barriers provide a uniform look and complete floor space coverage.
Underlayment plays a significant role in preparing for new flooring, offering benefits such as plank protection, insulation, sound reduction, and moisture barrier. Selecting the proper underlayment and ensuring it covers the entire area properly prevents direct contact with the subfloor and potential issues down the line.
Lastly, accounting for wood expansion is crucial. Wood planks can expand over time, so leaving expansion gaps at the room’s edges is important. Use a chalk line kit and measuring tool to outline the room’s perimeter with the necessary gaps for expansion, ensuring a precise and accurate floor plan that minimizes installation errors and material wastage.
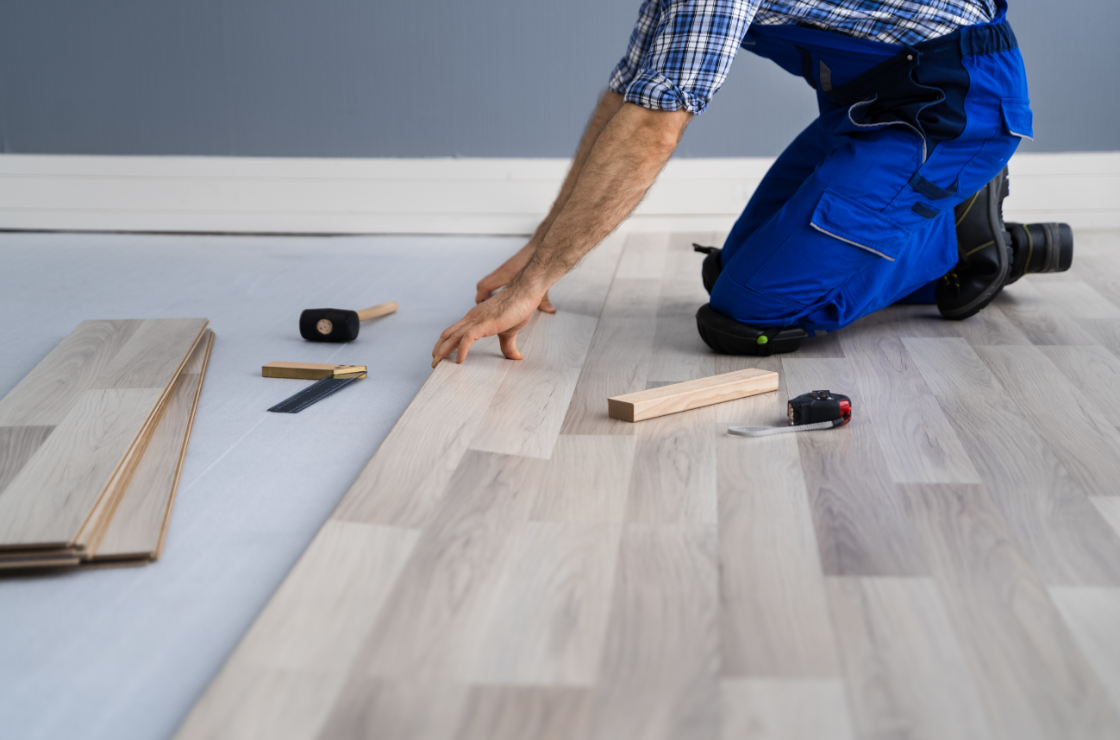
Engineered Hardwood Installation Tools
Specific tools help ensure a successful and efficient process when beginning an engineered hardwood installation. Specific tools include a tape measure for precise measurements, a saw to cut planks to size accurately, and a rubber mallet coupled with a tapping block to securely fit the planks together without damaging them. Some tools may be more necessary depending on the type of installation chosen.
Mallet
Installing any flooring featuring a click-lock mechanism inevitably involves some hammering to ensure tight joint connections. A rubber mallet is advisable, as its soft coating prevents damage to the planks during installation, especially if the tapping block is accidentally missed. In the absence of a rubber mallet, a traditional wooden mallet can suffice—just remember to target the tapping block rather than the flooring planks directly.
Pulling Bar
The pulling bar proves invaluable in addressing challenging spots, such as tight spaces near walls where a tapping block cannot be used. This uniquely designed metal tool fits into the narrow gap between a plank’s edge and any adjacent obstruction. A few taps on the bar effectively draw the plank close to its neighbor, ensuring a secure and snug joint.
Tape Measure
The time-honored adage among artisans of measuring twice and cutting once remains true in engineered hardwood installation. Use a dependable tape measure to ensure precise measurement of necessary cuts, marking them meticulously before cutting with a table or hand saw.
Saw
Engineered hardwood is a robust material with a real hardwood layer fused atop a plywood core for enhanced stability. Unlike luxury vinyl or laminate flooring, engineered wood demands a saw. While an electric table saw simplifies the task, achieving clean, stress-free cuts with a hand saw is feasible, assuming you have a well-maintained tenon saw.
Tapping Block
The tapping block is among the indispensable tools for successful engineered hardwood flooring installation. This tool facilitates the alignment and joining of planks by placing it over a joint and gently tapping it with a mallet. Available for purchase as part of specialized installation kits, the tapping block is crucial for achieving seamless joints between planks.
Types of Engineered Hardwood Installation
Engineered wood flooring combines flexibility and visual appeal, providing several installation options to suit various needs and preferences. The methods available for installation include glued-down, nailed-down, floating floor installation, and installation over radiant heat systems.
Glue-Down Installation
Glue-down installation involves adhering each engineered hardwood plank directly to the subfloor using a unique flooring adhesive. This method offers a stable and secure fit, reducing the potential for squeaks and movement. It’s particularly suited for concrete subfloors where nailing isn’t an option. However, it can be messier and more time-consuming, requiring careful preparation and cleanup. The use of adhesives also means there’s less room for error during installation.
- Pros: Stable and secure; suitable for concrete subfloors.
- Cons: Messy, requires precise application, and is difficult to remove or repair.
Nail-Down Installation
Nail-down installation is a traditional method where engineered hardwood planks are fastened to a wooden subfloor using nails or staples. This technique provides a solid feel underfoot and is ideal for wood subfloors. The process is generally quicker and less messy than glue-down installations. However, it won’t work for concrete subfloors and can be more challenging to execute with thinner wood products.
- Pros: Quick, less messy; solid underfoot feel.
- Cons: Not suitable for concrete; challenges with thinner boards.
Floating Floor Installation
Floating floor installation involves laying engineered hardwood planks without directly attaching them to the subfloor. Instead, planks interlock edge-to-edge, creating a surface that “floats” over the subfloor or an underlayment. This method allows for easier installation and removal, making it DIY-friendly. It can also accommodate underfloor heating systems and minor subfloor irregularities. The downside is that floating floors can sometimes feel less solid underfoot and may produce more noise when walked upon.
- Pros: Easy to install and remove; accommodates subfloor irregularities.
- Cons: Less solid feel with the potential for increased noise.
Installation Over Radiant Heat Systems
Engineered hardwood installation over radiant heat systems is possible due to the dimensional stability of engineered wood, which tolerates the expansion and contraction caused by changes in temperature better than solid wood. This installation requires specific considerations, such as ensuring the heating system is compatible with wood flooring and maintaining temperature limits to avoid damaging the wood. It offers the comfort of warm floors and efficient heating but requires careful planning and sometimes specialized underlayments to protect the integrity of the wood.
- Pros: Comfort of warm floors; efficient heating.
- Cons: It requires careful planning, and there are limitations on material and temperature settings.
Working With Professionals
Engineered hardwood installation offers the flexibility for a DIY approach, making it an appealing project for homeowners looking to enhance their living spaces personally. With the right tools, a clear understanding of the process, and patience, individuals can successfully install their flooring, adding a personal touch to their homes. However, the intricacies of installation, such as ensuring proper alignment, dealing with complex room layouts, and addressing subfloor issues, can often benefit from the expertise and efficiency of professional installers.
Working with professionals can mitigate potential installation challenges, ensuring the project maintains high-quality standards with minimal risk of errors that could affect the flooring’s longevity and appearance. Whether choosing the satisfaction of a DIY project or the assurance that comes with professional services, engineered hardwood flooring installation can be adapted to meet different needs and preferences.
Whether you aim to increase your home’s charm, comfort, or durability with various flooring options, our collection offers ideal solutions to suit your style and needs. At LA Carpet, we excel in exceptional craftsmanship and meticulous attention to detail. Our team guides clients through each step, from consultation to installation, ensuring a personalized and seamless experience. We recognize the importance of flooring in your remodeling efforts and are committed to achieving outstanding outcomes that surpass your expectations. Reach out today for a free estimate.

